Table of Contents
- What You'll Need Before You Start
- How to Use LED Face Mask for Anti-Aging: Step-by-Step
- LED Mask Frequency for Anti-Aging: How Often Is Enough?
- Benefits of Red vs Near-Infrared Light
- Building a Skincare Routine with LED Mask
- Common Mistakes to Avoid
- Troubleshooting and Device Care
- Conclusion
- Frequently Asked Questions
Last Updated: September 29, 2026
What You'll Need Before You Start
An LED face mask is a wearable device that shines specific wavelengths of light onto your skin to support collagen production and cellular repair. The best results come from a clean start, so gather a few basics first.
Here is what to have ready:
- A gentle cleanser
- A clean towel
- Your LED face mask, fully charged
- A lightweight serum (optional)
- Eye protection if your device includes it
Skip makeup, heavy creams, and oily products before a session. They block light from reaching your skin. According to Cleveland Clinic dermatology overview of light therapy, clean skin lets light penetrate more evenly.
Keeping your setup simple is key. A dedicated spot near a mirror makes the habit easier to repeat.
How to Use LED Face Mask for Anti-Aging: Step-by-Step
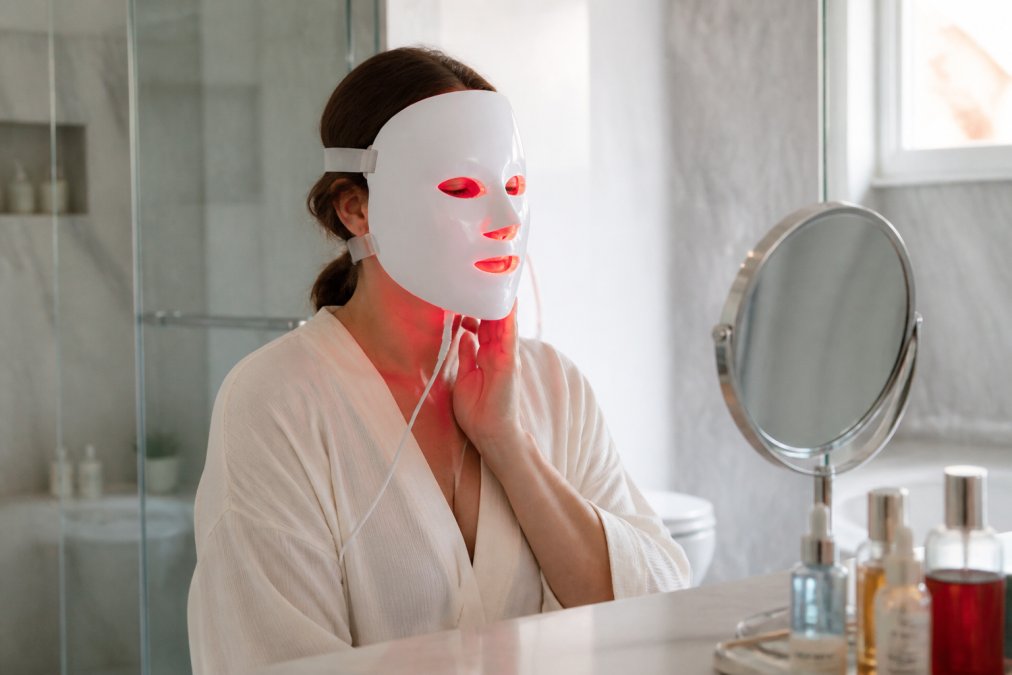
Using an LED face mask for anti-aging takes about 15 to 20 minutes per session. The steps below cover prep, light selection, wear time, and the post-session layering most guides skip, so you get consistent results instead of guesswork.
Step 1: Cleanse and Prep Your Skin
Start with a clean face. Wash with a gentle, non-stripping cleanser and pat dry with a clean towel.
Remove any makeup, sunscreen, or serum residue. These create a barrier that blocks light.
Step 2: Choose Your Light Mode and Session Duration
Red light (roughly 630-660 nm) targets fine lines and supports collagen production. Near-infrared light (roughly 810-850 nm) reaches deeper layers for firmness and cellular repair.
Step 3: Wear the Mask and Let It Work
Place the mask over your face and adjust the strap for a snug but not tight fit. Lie back and relax.
Step 4: Layer Your Post-Treatment Skincare by Skin Type
This is the step most guides gloss over. What you apply in the five minutes after a session matters, because skin is warm, slightly more permeable, and primed to absorb.
- Dry or mature skin: Apply a hyaluronic acid serum to damp skin, then seal with a ceramide-rich moisturizer. The light session can feel drying, so this step prevents the tightness some users mistake for irritation.
- Oily or acne-prone skin: Use a lightweight, non-comedogenic gel moisturizer with niacinamide. Skip heavy occlusives, which can trap heat and trigger breakouts along the mask edges.
- Sensitive or reactive skin: Stick to a single bland moisturizer, no actives, no fragrance. Let skin settle for 20 minutes before adding anything else.
- Combination skin: Treat zones separately. A richer cream on cheeks, a gel on the T-zone.
Step 5: Clean the Device Before You Put It Away
Wipe the inside of the mask with a soft, slightly damp cloth or an alcohol-free wipe. Let it air-dry fully before folding or storing it. A mask that stays damp between sessions is a common cause of new breakouts along the jawline and temples.
LED Mask Frequency for Anti-Aging: How Often Is Enough?
Most people see the best results using an LED face mask three to five times per week. Consistency matters more than session length, a 10-minute session done four times beats a 20-minute session done once.
The Ramp-Up Phase (Weeks 1-6)
A common pattern practitioners recommend:
- Weeks 1-2: three sessions per week, 10 minutes each
- Weeks 3-4: four sessions per week, 15 minutes each
- Weeks 5-6: five sessions per week if your skin tolerates it
More is not always better. Overuse can leave skin red or sensitive. Give your skin a rest day between heavier weeks.
The Maintenance Phase (Week 7 Onward)
This is where most guides stop, and where most users quit. Once you have completed six weeks of consistent use, you do not need to keep the same intensity forever.
A practical maintenance protocol:
- Drop to two to three sessions per week. This is enough to sustain collagen and elastin gains for most users.
- Keep sessions at 15 minutes. Do not shorten them just because you are using the mask less often, the per-session dose is what drives the effect.
- Re-ramp seasonally. Many users go back to four to five sessions per week for two to three weeks at the start of fall and spring, when skin tends to look duller due to drier indoor air and less sun exposure.
- Take one full week off every eight to twelve weeks. This 'deload' week gives the skin barrier a reset and makes it easier to spot whether the mask is actually contributing to your results.
Troubleshooting Common Side Effects
Starting a new device often triggers questions that a frequency chart cannot answer. Here is what to do when something feels off:
- Mild redness that fades within an hour: Normal. Continue your schedule.
- Redness lasting more than a few hours: Shorten your next session by five minutes and drop one session from the week. Rebuild slowly.
- Itching, rash, or hives: Stop use. This can indicate a reaction to the silicone, the light itself, or a product you layered underneath. Patch-test on your inner forearm before resuming.
- New breakouts along the mask edges: Usually a hygiene issue, not a light issue. Clean the mask after every session and check that your post-mask moisturizer is non-comedogenic.
- Purging vs. irritation: If breakouts appear in areas you normally break out, it is likely purging and should settle in two to four weeks. If they appear in new areas, especially along the strap line, it is irritation, and you should reduce frequency.
Benefits of Red vs Near-Infrared Light
Red and near-infrared light work on different depths of skin, so they solve different problems. Red light sits at the surface. Near-infrared goes deeper.
Here is how they compare:
| Light Type | Wavelength Range | Main Benefit | Best For |
|---|---|---|---|
| Red light | 630-660 nm | Collagen and elastin support | Fine lines, skin texture |
| Near-infrared | 810-850 nm | Deeper cellular repair | Firmness, recovery |
| Combined modes | Varies by device | Both effects at once | Full anti-aging routine |
Building a Skincare Routine with LED Mask
An LED face mask fits best right after cleansing and before heavier products. Order matters because light needs a clear path to your skin.
Try this sequence:
- Cleanse and pat dry
- Run your LED session
- Apply a hydrating serum
- Follow with moisturizer
- Use sunscreen in the morning
Common Mistakes to Avoid
The biggest mistake is treating your LED mask like a one-time fix. It works through steady, repeated sessions over weeks.
Other common errors:
- Wearing the mask over dirty skin
- Using it right after retinol
- Skipping sessions for a week, then doubling up
- Ignoring eye protection
- Never cleaning the mask
Troubleshooting and Device Care
Redness after a session is normal for some people and usually fades within an hour. If it lasts longer, shorten your next session and lower the intensity.
Watch for these signs:
- Warmth that feels uncomfortable
- Itching or a rash
- New breakouts along the mask edges
Conclusion
Building a steady LED mask habit takes patience, but the routine itself is simple: cleanse, choose your mode, wear the mask, and repeat three to five times a week. The payoff comes from consistency, not intensity.
Frequently Asked Questions
Do LED face masks actually work for anti-aging?
LED face masks use specific wavelengths of red and near-infrared light to stimulate collagen production and support cellular repair. Clinical studies show improvements in fine lines, wrinkles, and skin firmness with consistent use. Results build gradually, so you'll likely notice smoother texture and a more even tone after several weeks of regular sessions. At-home devices are less intense than those in a dermatological clinical setting, but they offer a convenient, non-invasive option for ongoing skin rejuvenation.
What should I put on my face before using an LED mask?
Start with clean, dry skin. Remove makeup and cleanse gently, then apply a lightweight, water-based serum if you like. Avoid heavy creams or oil-based products because they can block light penetration. Some people use a hyaluronic acid serum for extra hydration. Do not apply retinol or other strong active ingredients right before your session unless your device instructions say it's safe. Always check the manual for specific guidance on skincare layering.
How often should you use a LED light face mask for visible results?
Most at-home LED masks are designed for use three to five times per week. Consistency matters more than duration, so a 10- to 20-minute session on a regular schedule works better than sporadic longer sessions. If your skin is sensitive, start with two or three times per week and gradually increase. Always follow the manufacturer's recommended frequency for your specific device to avoid overuse and skin irritation.
Can I use an LED mask with retinol or other active ingredients?
Yes, but timing is key. Retinol and other exfoliating acids can make your skin more sensitive to light, so it's best to use them on alternate days or at least a few hours apart from your LED session. Some people apply retinol at night and use the LED mask in the morning. If you experience redness or irritation, scale back. Always introduce active ingredients slowly and consult a dermatologist if you have concerns about combining treatments.