Table of Contents
- Why Renter-Friendly Smart Blinds Matter
- No-Drill Motorized Blinds: Installation Without Damage
- Smart Blind Retrofitting Kits for Existing Blinds
- How to Automate Manual Blinds Step-by-Step
- Smart Home Integration and Scheduling
- Protecting Your Security Deposit
- Maintenance and Troubleshooting for Renters
- Frequently Asked Questions
Last Updated: October 3, 2026
Why Renter-Friendly Smart Blinds Matter
Renters face a unique challenge when it comes to home automation. You want to upgrade your space, but you can't drill holes or make permanent changes. Renter-friendly smart blinds solve this problem by offering motorized window treatments that install without damaging walls or window frames.
Traditional smart blind installation often requires professional mounting, drilling, and permanent fixtures. That means losing your security deposit or paying for removal when you move. Renter-friendly options eliminate that risk entirely.
The appeal goes beyond avoiding landlord conflicts. Smart blinds automate your daily routine. They open with your alarm, close at sunset, or respond to voice commands. You get the convenience of home automation without the commitment, or the damage.
At WellnessLifeClub74, we understand that renters need solutions that work within lease restrictions. Our curated collection of renter-friendly smart blinds combines innovation with practicality. You get trending technology without the permanent installation headaches.
No-Drill Motorized Blinds: Installation Without Damage
No-drill motorized blinds are the simplest path to automation. They mount using tension systems or adhesive methods that leave no trace when removed.
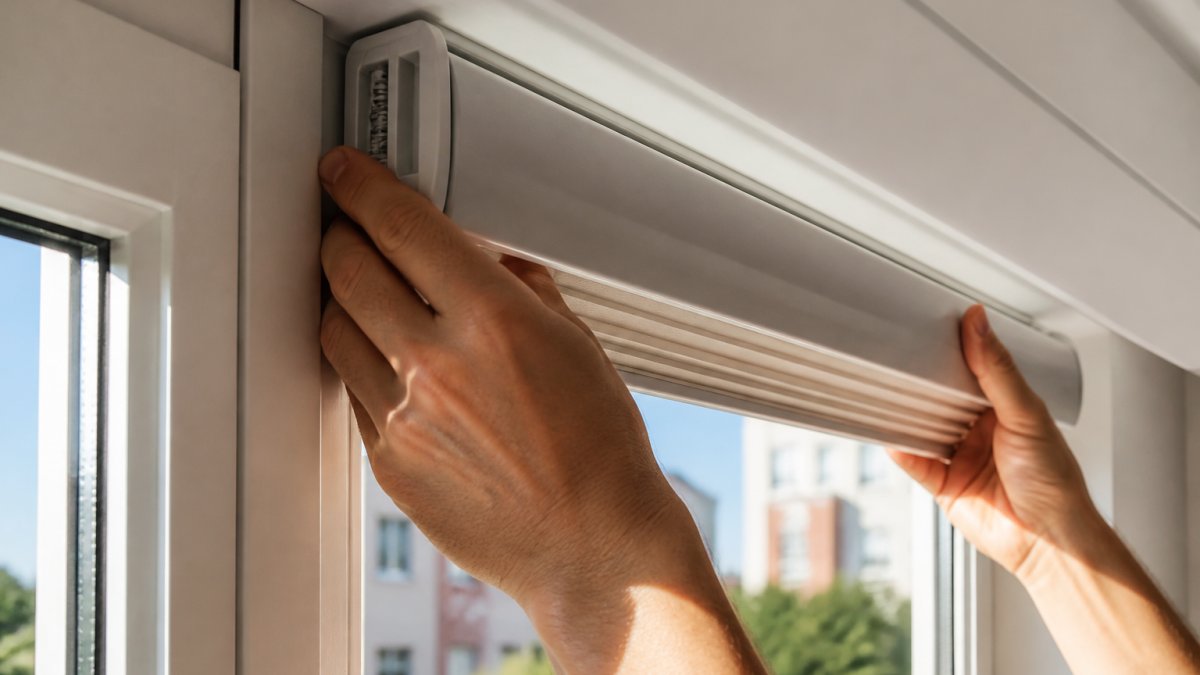
Tension-Mounted Systems
Tension-mounted smart blinds use spring-loaded brackets that grip your window frame without fasteners. The brackets sit inside the frame opening and hold the blind securely through pressure alone.
Installation takes minutes. You measure your window width, order the correct size, and clip the brackets into place. No tools needed. No holes. No landlord notification required.
The key advantage is reversibility. Remove the blind, and your window frame looks untouched. Your security deposit stays safe.
Tension systems work best for standard rectangular windows. They perform well in apartments, dorms, and temporary rentals.
One thing to watch: tension mounts require precise width measurements. Order too narrow, and the blind won't stay in place. Order too wide, and it won't fit the frame.
Adhesive Mount Options
Adhesive mounting uses strong, removable adhesive strips to attach brackets to the window frame. These strips bond securely but peel off cleanly without residue.
The process is straightforward. Clean the frame, apply the adhesive strips, press the brackets firmly, and wait for the adhesive to cure (usually 24 hours). Then install your motorized blind.
Adhesive mounts work on any window frame material: wood, vinyl, aluminum, or composite. They're ideal for windows where tension mounting won't grip properly.
The catch is permanence during the lease. Once the adhesive cures, the blind stays put. You can't easily adjust or remove it mid-lease. Plan your placement carefully before installation.
Removal is simple when you're ready to move. Peel the adhesive strips slowly at a low angle. Most quality removable adhesive leaves no damage. Test on a small, hidden area first if you're concerned.
Smart Blind Retrofitting Kits for Existing Blinds
Already have blinds you like? Retrofit kits add motorization without replacing them. You keep your existing blinds and add a smart motor to the rod.
Retrofit Motor Installation Steps
Retrofit motors fit inside your blind's existing roller tube. Here's how to install one:
-
Remove your blind from the window. Unhook it from the brackets and lay it flat on a clean surface.
-
Identify the roller tube. This is the horizontal rod your blind fabric wraps around. It slides out from the blind's headrail.
-
Slide the motor into the tube. Retrofit motors are designed to fit standard roller tube diameters. Insert it from one end until it seats fully.
-
Reinstall the roller. Place the motor-equipped roller back into the blind's headrail. Make sure it spins freely.
-
Mount the blind back on the window. Use your existing brackets. The motor adds minimal weight.
-
Connect power. Plug the motor into a USB outlet or insert batteries, depending on your kit.
-
Test the motor. Run the blind up and down several times to ensure smooth operation.
The entire process takes 15-30 minutes. No special tools required. Most retrofit kits include all necessary hardware and clear instructions.
Compatibility Checklist
Before buying a retrofit kit, verify compatibility with your existing blind:
- Roller tube diameter: Measure the tube width. Retrofit motors fit 1.5-inch or 2-inch tubes. Verify your blind matches.
- Blind weight: Heavier blackout blinds need motors rated for higher torque. Check the motor's weight capacity.
- Roller tube condition: The tube must spin freely. If your blind is damaged or stuck, a retrofit won't work.
- Headrail design: Some premium blinds have sealed headrails that don't allow motor insertion. Check the manufacturer's specs.
- Existing brackets: Your current mounting brackets must support the added motor weight. Most standard brackets do.
- Power source: Decide between USB power (requires nearby outlet) or batteries (requires occasional replacement).
Test your blind's roller tube before purchasing. Spin it by hand to confirm it moves smoothly. A stiff or damaged tube will strain the motor and reduce its lifespan.
How to Automate Manual Blinds Step-by-Step
Converting manual blinds to smart blinds is achievable with the right approach. You'll assess your setup, select a motor, and program basic automation.
Assessing Your Current Setup
Start by evaluating what you have:
- Blind type: Roller blinds, cellular shades, or vertical blinds all have different retrofit options.
- Window size: Measure width and height. Larger windows need stronger motors.
- Current condition: Are the blinds functioning smoothly, or do they stick or jam?
- Power access: Where's the nearest outlet? Can you route power discreetly?
- Smart home ecosystem: Do you use Alexa, Google Home, or Apple HomeKit? Choose a motor compatible with your system.
Take photos of your window setup from multiple angles. This helps when selecting the right retrofit kit or replacement blind.
Motor Selection and Installation
Choose a motor that matches your blind type and window size. Retrofit motors come in different power ratings:
- Light-duty motors: Best for small roller blinds and lightweight cellular shades. Lower cost, adequate for most apartment windows.
- Standard-duty motors: Suited for medium-sized blinds and moderate blackout fabrics. Good balance of power and price.
- Heavy-duty motors: Designed for large windows, thick blackout blinds, or vertical blinds. Higher cost but essential for demanding applications.
Installation depends on your motor type. Retrofit motors install inside existing blinds (as described above). Replacement motors come pre-installed in new blinds, you simply mount the entire blind assembly.
For retrofit installation, follow the manufacturer's instructions precisely. Most kits include video guides. Don't skip steps or skip the 24-hour curing time if adhesive is involved.
Remote Programming and Voice Control
Once the motor is installed, set up remote control and voice commands:
-
Download the app. Most smart blind motors use a dedicated mobile app. Search your phone's app store for the motor brand.
-
Create an account. Register with your email and create a password.
-
Add your device. Use the app to scan the motor's QR code or enter its serial number. The app will walk you through pairing.
-
Name your blind. Call it "Living Room Blind" or "Bedroom Shade", something you'll remember for voice commands.
-
Test manual control. Open and close the blind using the app. Verify smooth operation.
-
Link to your voice assistant. If your motor supports Alexa or Google Home, enable the skill or action in your assistant's app. Select your blind from the list of available devices.
-
Test voice commands. Say "Alexa, open the living room blind" or "Google, close the bedroom shade." Confirm the blind responds.
Voice control works best with clear, distinct names. Avoid names that sound similar to other commands. "Blind" works better than "B-1" for voice recognition.
Smart Home Integration and Scheduling
Smart blind automation transforms your blinds from manual tools into intelligent home devices. Once integrated into your smart home system, they work together with other devices.
Create schedules that match your routine. Program blinds to open at 6:30 AM on weekdays, simulating a natural sunrise.
Integrate blinds with other smart devices for coordinated automation. When your smart thermostat detects high heat, close the blinds to reduce cooling costs.
Voice control adds convenience. Instead of reaching for a remote, simply speak. "Alexa, close all blinds" works faster than manual adjustment, especially for multiple windows.
Many smart blind systems offer geofencing. Your blinds open when you arrive home and close when you leave. This creates the appearance of occupancy, a subtle security benefit.
Test your automation rules for a week. Adjust timing as needed. Some people prefer gradual opening (blinds reach full open over 10 minutes) rather than instant movement.
Protecting Your Security Deposit
Your security deposit is at stake with any installation. Renter-friendly smart blinds minimize risk, but you need to take precautions.
Document your original window condition before installation. Take photos and video of the bare windows, frame, and sill.
Use only removable installation methods. Tension mounts and removable adhesive strips are deposit-safe. Drilling, permanent fasteners, or caulk are not.
Keep all original hardware and packaging. When you move, you'll reinstall original blinds or remove smart blinds completely.
Test removal before you commit. Apply a small piece of removable adhesive to a hidden area of your window frame.
Notify your landlord in writing before installation. A simple email, "I'm installing removable smart blinds that don't damage the window frame", creates a record.
Take removal photos just as you took installation photos. Document that your windows are returned to original condition. This protects you if a landlord falsely claims damage.
Maintenance and Troubleshooting for Renters
Smart blinds require minimal maintenance, but a few habits extend their lifespan.
Check battery levels monthly. Battery-powered blinds alert you when power runs low. Replace batteries promptly to avoid missed automations.
Test voice commands weekly. Confirm your smart assistant still recognizes and controls the blinds.
Inspect tension brackets quarterly. Ensure they're gripping the window frame firmly. If they've loosened, remove and reposition them.
Clean the roller tube. If your blind sticks or moves unevenly, the roller tube may have accumulated dirt.
Common issues and fixes:
- Blind won't open or close: Check battery level. Restart the motor by unplugging it for 10 seconds, then plugging back in.
- Voice commands not working: Re-pair the device in your smart assistant's app. Confirm your WiFi is stable.
- Blind moves slowly or unevenly: Clean the roller tube and inspect for obstructions. Ensure the motor isn't overloaded.
- Adhesive strips peeling: This is normal over time. Reinforced with fresh removable adhesive strips if needed. Tension mounting is more stable long-term.
When you move, remove the smart blinds carefully. Peel adhesive strips at a shallow angle to minimize frame damage.
Renter-friendly smart blinds give you home automation without lease violations or deposit risks.
At WellnessLifeClub74, we stock a curated selection of renter-friendly smart blinds that combine ease of installation with reliable performance.
| Installation Type | Best For | Removal Difficulty | Cost Range |
|---|---|---|---|
| Tension-mounted | Standard rectangular windows, quick setup | Very easy | Budget-friendly |
| Adhesive mount | Any frame material, permanent during lease | Easy | Moderate |
| Retrofit kits | Existing blinds you want to keep | Moderate | Mid-range |
| Replacement motorized | New blinds, maximum features | Moderate | Premium |
American Rental Housing Association guidelines on tenant modifications
Consumer Reports smart home device reliability testing
Federal Trade Commission guide to renter rights and security deposits
Frequently Asked Questions
Can you install smart blinds without drilling holes?
Yes. Tension-mounted and adhesive-based systems allow you to install renter-friendly smart blinds without drilling. Tension-mounted brackets grip your window frame from the inside, while adhesive mounts use strong strips that remove cleanly. Both methods preserve your rental's condition and protect your security deposit. Verify your window frame material before choosing, metal frames work best with tension systems, while vinyl frames suit adhesive mounts.
What are smart blind retrofitting kits and how do they work?
Smart blind retrofitting kits add motorized control to your existing manual blinds by installing a compact motor into the blind's roller tube. The kit includes the motor, wireless remote, app connectivity, and mounting hardware. Installation typically takes 30 minutes and requires no drilling, you simply remove the end cap, insert the motor, and reconnect the tube. This approach is ideal for renters who want automation without replacing their blinds entirely.
How do I automate manual blinds in a rental apartment?
To automate manual blinds, install a retrofitting kit motor inside the existing roller tube, or mount a separate motorized blind system using tension or adhesive brackets. Start by measuring your blind width and checking compatibility with available retrofit motors. Install the motor, pair it with your smart home hub, and program scheduling through the app. This method costs less than replacing blinds and requires no permanent modifications.
Will smart blinds damage my rental's window frames?
No-drill installation methods protect window frames. Tension-mounted systems clamp without puncturing, and adhesive mounts use removable strips that leave no marks when removed properly. Avoid drilling into frames, which creates holes that landlords may charge to repair. Always test adhesive removal in an inconspicuous spot first, and keep all original hardware for reinstallation when you move.